In this article
What is a cocked cap (cocked closure)
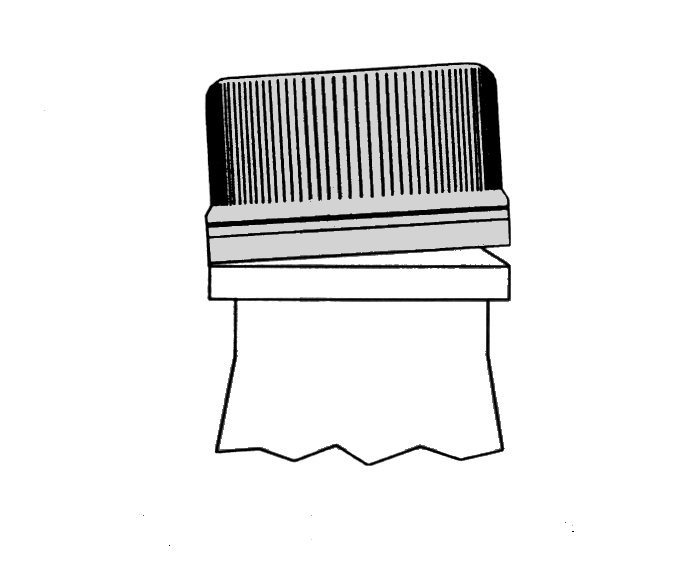
A cocked cap, also referred to as cocked closure in technical literature, is a plastic cap that was applied tilted on the bottle finish instead of seating perpendicular to the mouth. The result is almost always the same: leakage. On carbonated products, you add CO₂ loss; on viscous liquids, mess on the outside of the package. Either way, it is a defect that reaches the consumer — and usually turns into a customer-service complaint.
The root cause is almost never the cap itself. In the great majority of cases, the problem lies in incorrect equipment setup: misaligned capping head, star wheel out of sync, wrong vertical load, turret too high or low. Hence the golden rule of packaging: before changing the lot, audit the machine.
How to diagnose: look at the thread deformation
Cocked-cap diagnosis has a clear visual sign: the thread roots. Grab a defective sample and observe the deformation direction:
- Threads deformed toward the liner (sealing material): the cap was tilted at the moment of application. Confirms cocked cap.
- Chuck scratches on the upper radius of the cap: another clear indicator of tilt during threading.
- Threads deformed toward the bands (tamper-evidence): in this case the problem is not cocked cap — it is excessive application force. The root cause is different, but it is worth noting so as not to treat the wrong symptom.
Another fundamental precaution: record the head number when collecting the sample. If the defect always shows up on the same head, the problem is mechanical on that specific head. If it shows up on several, suspect the lot quality of caps or bottles first before touching the equipment.
Possible causes — Cap
Before any mechanical adjustment, rule out a bad lot:
| Item | Cause | Solution |
|---|---|---|
| 1.1.1 | Cap out of dimensions. | Change the cap lot and engage supplier technical support for analysis. |
| 1.1.2 | Deformed cap (damaged thread or missing thread roots). | Change the lot and engage supplier technical support for analysis. |
Possible causes — Bottle
The bottle finish (the threaded area that receives the cap) is as critical as the cap itself. Small deviations create cocked caps in series:
| Item | Cause | Solution |
|---|---|---|
| 1.2.1 | Misaligned finish. | Inspect bottles for lack of perpendicularity or finish offset relative to the body. |
| 1.2.2 | Dimensional excess on the finish. | Check with the "go/no-go" gauge specific for the finish in use. Contact the supplier. |
| 1.2.3 | Deformed finish. | Inspect for excess material, deformations or damaged threads. |
Possible causes — Capper
Here is the long list — and the most likely to contain the root cause. There are 17 equipment-setup items that can generate a cocked cap, separated by system (C.I.H. or Pick-Off):
| Item | Cause | Solution |
|---|---|---|
| 1.3.1 | Mixed or wrong parts after format change. | Ensure all parts match the bottle currently in use. |
| 1.3.2 | Star wheel misadjusted. | Review star wheel sync relative to the heads. Position the bottle directly under the head, confirm correct height and equal clearance on each side. |
| 1.3.3 | Rear guide misadjusted. | The rear guide supports the bottle inside the star-wheel pocket. It should be 1 to 1.5 mm below the anti-rotation inserts. |
| 1.3.4 | Excessive vertical load. | Adjust capping-head vertical load to the 20 to 40 lb range. |
| 1.3.5 | Turret too high or too low. | Place a hand-threaded bottle at the rear of the capper. For Magna Torq, the magnetic capping head reference line must match the upper edge of the housing. For other heads, check 5 mm compression or consult the manual. |
| 1.3.6 | Excessive radial clearance in the head. | Check hub, key and head housing condition. Replace as needed. |
| 1.3.7 | Static torque too high on heads. | Adjust static torque to the correct window of 10 ± 2 in.lb. |
| 1.3.8 | Excessive radial clearance on the spindle shaft. | Check the condition of the central bearing and bushing. |
| 1.3.9 | Foreign bodies in the chuck. | Check the chuck and remove stuck bands or residue. Investigate the root cause of the inverted cap that produced the residue. |
| 1.3.10 | Wrong chuck or damaged splines. | Confirm chucks in use are the correct ones and splines are not excessively worn. If suspect, install the chuck on another head to see if the defect follows it. |
| 1.3.11 (C.I.H.) | Cap ejector pin spring damaged, broken or missing. | Confirm the ejector pin is not sitting lower than normal above the feed star wheel. Check the spring and replace as needed. |
| 1.3.12 (C.I.H.) | Chuck O-ring damaged or retaining balls stuck. | Check that the balls move freely and the O-rings are intact. Replace if needed. |
| 1.3.13 (P.O.) | Launcher air pressure too high or too low. | Adjust air pressure to correctly position the cap in the launcher arms. |
| 1.3.14 (C.I.H.) | Incorrect transfer plate clearance. | Review the clearance between the plate and the cap. For CSI equipment with PCO cam, clearance should be 1 to 1.5 mm. The head must not press the band against the plate. Add shims to the mount if needed. |
| 1.3.15 (P.O.) | Cap launcher misadjusted. | Inspect for being too high or misaligned. Arm opening should be approximately 25.4 mm. Check centering relative to the package. |
| 1.3.16 (P.O.) | Excessive force in the pre-torque serrated arm. | Replace the spring with one of lower tension. |
| 1.3.17 (P.O.) | Pre-torque misadjusted. | Reinstall the pre-torque at correct height — the serrated arm must engage at mid-height of the cap. Confirm that the arm's curvature radius is in the package path. |
Practical criterion: when to act
If the failure shows up more than 1 time in 10,000 applications, it is time to stop and correct. Below that threshold, monitor. Above it, act before it becomes a customer-service complaint or recall.
This criterion is a general guideline. On sensitive products (carbonated drinks, pharmaceuticals, chilled foods), the limit tends to be even tighter. End customers spot a cocked cap on the first sip — and rarely forget.
C.I.H. vs Pick-Off — adapt the diagnosis to your equipment
The two dominant capping systems on the market are Cap In Head (C.I.H.) and Pick-Off (P.O.). They differ in how the cap is transferred and pre-torqued before final threading:
- C.I.H. (Cap In Head): the cap enters the head directly, retained by a ball ring with O-ring. Exclusive causes: transfer plate (1.3.14), balls/O-ring (1.3.12), ejector pin spring (1.3.11).
- Pick-Off (P.O.): the cap passes through an external launcher with pre-torque before the head. Exclusive causes: launcher air pressure (1.3.13), launcher adjustment (1.3.15), serrated arm force (1.3.16), pre-torque (1.3.17).
Items 1.3.1 through 1.3.10 apply to both. Knowing which system you operate saves hours of diagnostic time on causes that do not apply.
Next step: download the full guide
Cocked cap is just one of the 13 most common capping failures. The other 12 — broken band, smiley band, missing band, cracked cap, high cap, under-applied cap, CO₂ leak, caps jamming in the chute, inverted caps, caps coming out of the launcher, bottles without caps, and bands that don't work — all follow the same diagnostic pattern crossing cap, bottle and capper.
Gromar's complete technical guide brings the 13 failures together, with tables, photos and practical solutions. It is free and was written by people who have been inside packaging plants for nearly 4 decades.
Guide to Cap Application Problems
The 13 most common capper failures — diagnosis, root cause and correction. Free technical material.
Download the full guide →