In this article
What is a high cap
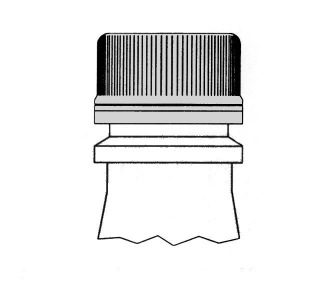
The high cap is the one that comes off the capper stopped above the sealing point. It ended up too high — it did not descend enough for the liner to touch the sealing surface of the bottle finish. The result is immediate leak of liquid or CO₂, and the consumer notices before even opening it.
It is one of the easiest defects to identify visually: the cap looks like it is floating over the bottle. The symptom is binary — either the cap seals, or it doesn't. There is no in-between.
The hand test: 5 seconds of diagnosis
Grab a suspect sample and try to thread the cap by hand onto the finish. If you cannot tighten it any further, it's a high cap — the capper stopped early. If you can tighten it (and the cap becomes firmer), it's an under-applied cap, a different problem with different causes.
This 5-second test distinguishes between the two most commonly confused defects on the packaging line. A new engineer tends to call both "loose cap" and treat them the same way — but the root causes are opposite.
Possible causes — Cap
| Item | Cause | Solution |
|---|---|---|
| 4.1.1 | Cap with deformed thread roots. | Change the lot and engage supplier technical support. |
| 4.1.2 | Cap incorrect for the finish in use. | Confirm by the box label that the cap is the one recommended for that package. Common errors: PET cap applied to glass (or vice versa), old-neck cap applied to PCO 1881 finish. |
Possible causes — Bottle
On glass bottles, finish roughness (generated by high-temperature treatment) plays a decisive role:
| Item | Cause | Solution |
|---|---|---|
| 4.2.1 | Finish with excessive roughness (high-temperature treatment — glass only). | Contact the bottle supplier. Recommendation: minimum 4 ctu, maximum 10 ctu. Outside that range, the cap binds before seating. |
| 4.2.2 | Dimensional excess on the bottle finish. | "Go/no-go" gauge + report to supplier. |
| 4.2.3 | Finish with damaged thread or surfaces. | Inspect and discard defective ones. |
Possible causes — Capper
On the capper, only one cause. And it is tricky because it is the same one that creates broken band and cracked cap:
| Item | Cause | Solution |
|---|---|---|
| 4.3.1 | Excessive vertical load — causes the cap thread roots to deform and overlap the finish threads, jamming the cap before seating. | Adjust the capping head vertical load to the 20 to 40 lb range. This is the single adjustment that affects multiple defects — audit it first. |
Notice the economy: one single adjustment (vertical load in the 20-40 lb range) simultaneously solves high cap, broken band and cracked cap. When a line shows more than one defect at the same time, this is the first place to look.
Next step
High cap is a critical problem, but with simple diagnosis and quick correction — as long as you can tell it apart from under-applied cap and identify the wrong cap lot. The complete technical guide ties these 13 problems together into a single reference.
Guide to Cap Application Problems
The 13 most common capper failures — diagnosis, root cause and correction. Free technical material.
Download the full guide →